
12. Silicone sample of face. This is a different silicone to the mould and has a flesh pigment in it aswell as catalyst. NO THIXO. All moulding/casting materials are from Notcutts. I cut holes into the eyes and popped in the tiny 6mm acrylic eyes. Really pleased with these, hard to source eyes this small, got them from a doll shop on ebay. Also started playing with hair punching into his chin.

11. Fingerless gloves and cuffs.


10. Cast a resin sample of the figure to make the clothes on. Here is Jumper one. Like the murky colour but worry bulky sleeves wont fit under coat so will knit sweater vest and cuffs to give illusion of jumper. Puppet height is 14 inches.

9. Prised mould open, cleaned plastaline off armature and it fits.

9. Plaster mixed with water, followed by plaster socked scrim and poles for extra support when pulling mould apart. Turn over and repeat with silicone and plaster. Remember to put release on first so the mould can be split. LPJ for the silicone and slip for the plaster.

8. Remove clay wall, cut keys around silicone edge and make circle keys into clay bed ready for plaster jacket layer.

7. First layer of silicone is mixed with 10% catalyst, second layer is mixed with thixo as well as catalyst. The first layer gets the details. I had to do a third layer with thixo aswell because of the high points like the feet and hands.

6. The mould making process, put my figure into clay bed so he is halved, built up clay wall around him and made keys (circles).

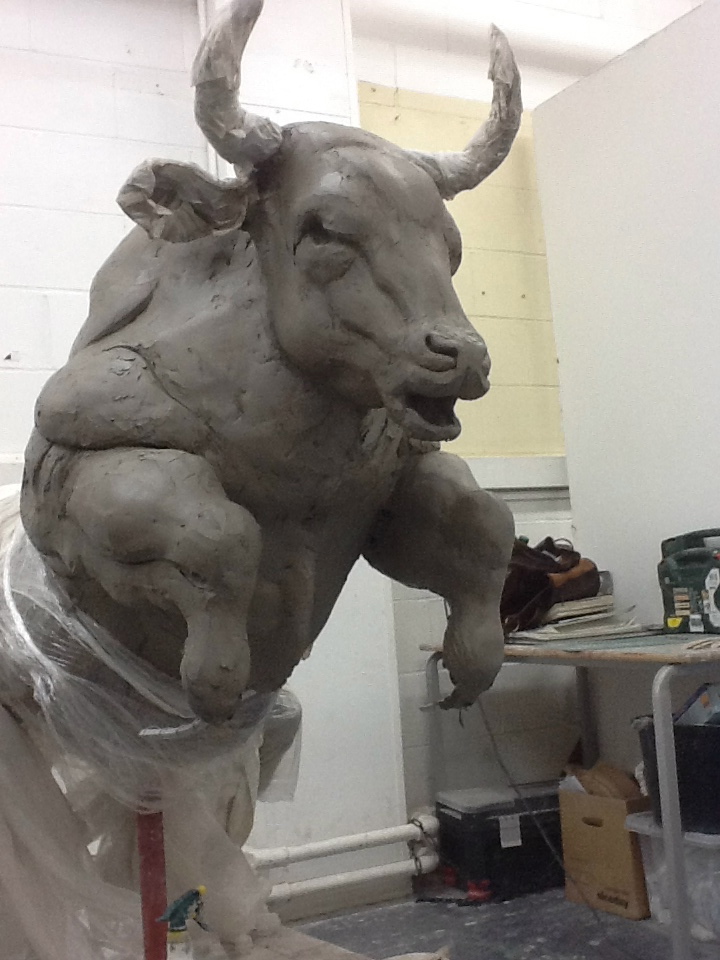
5. Sculpting the face was difficult, however Im pleased with the kind face he has and the defined forehead wrinkles. Used dental tools for this.

4. Face concept drawing inspired by image I found.

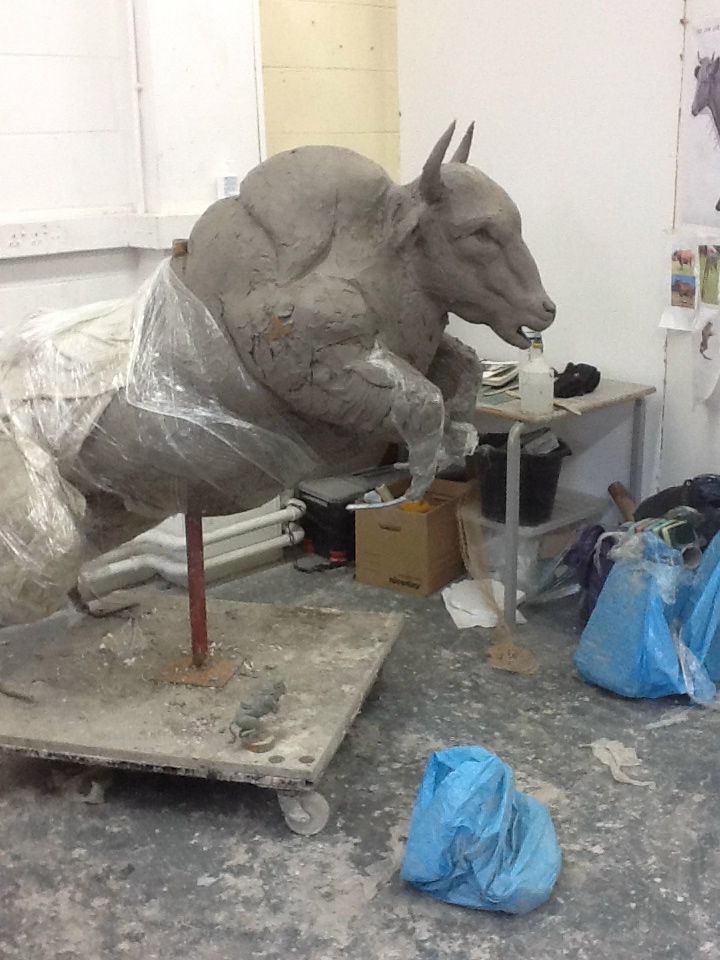
3. Here I have aged the figure and turned him into a skinny old man by bringing out his bones (hip, breast etc) and using a rake tool to remove the buff muscle he had before.

2. I am scultping onto the armature in soft Plastaline from Tirantis. By sculpting onto the armature I know later the armature will fit into the figure mould. I used a book called Anatomy for the Artist by Sarah Simblet to build up a well proportioned male figure. This figure is far too youthful and muscular though for my character.

1. First I made a Ball and socket joint armature from stratch with magnets in the puppets feet to hold him to the floor. This took about two weeks to make in the metal workshop at college.


.jpeg)
.jpeg)
.jpeg)
.jpeg)
.JPG)
.jpeg)
.jpeg)
 12. Silicone sample of face. This is a different silicone to the mould and has a flesh pigment in it aswell as catalyst. NO THIXO. All moulding/casting materials are from Notcutts. I cut holes into the eyes and popped in the tiny 6mm acrylic eyes. Really pleased with these, hard to source eyes this small, got them from a doll shop on ebay. Also started playing with hair punching into his chin.
 11. Fingerless gloves and cuffs.
 10. Cast a resin sample of the figure to make the clothes on. Here is Jumper one. Like the murky colour but worry bulky sleeves wont fit under coat so will knit sweater vest and cuffs to give illusion of jumper. Puppet height is 14 inches.
 9. Prised mould open, cleaned plastaline off armature and it fits.
 9. Plaster mixed with water, followed by plaster socked scrim and poles for extra support when pulling mould apart. Turn over and repeat with silicone and plaster. Remember to put release on first so the mould can be split. LPJ for the silicone and slip for the plaster.
 8. Remove clay wall, cut keys around silicone edge and make circle keys into clay bed ready for plaster jacket layer.
 7. First layer of silicone is mixed with 10% catalyst, second layer is mixed with thixo as well as catalyst. The first layer gets the details. I had to do a third layer with thixo aswell because of the high points like the feet and hands.
 6. The mould making process, put my figure into clay bed so he is halved, built up clay wall around him and made keys (circles).
 5. Sculpting the face was difficult, however Im pleased with the kind face he has and the defined forehead wrinkles. Used dental tools for this.
 4. Face concept drawing inspired by image I found.
 3. Here I have aged the figure and turned him into a skinny old man by bringing out his bones (hip, breast etc) and using a rake tool to remove the buff muscle he had before.
 2. I am scultping onto the armature in soft Plastaline from Tirantis. By sculpting onto the armature I know later the armature will fit into the figure mould. I used a book called Anatomy for the Artist by Sarah Simblet to build up a well proportioned male figure. This figure is far too youthful and muscular though for my character.

