
4

3

2
1
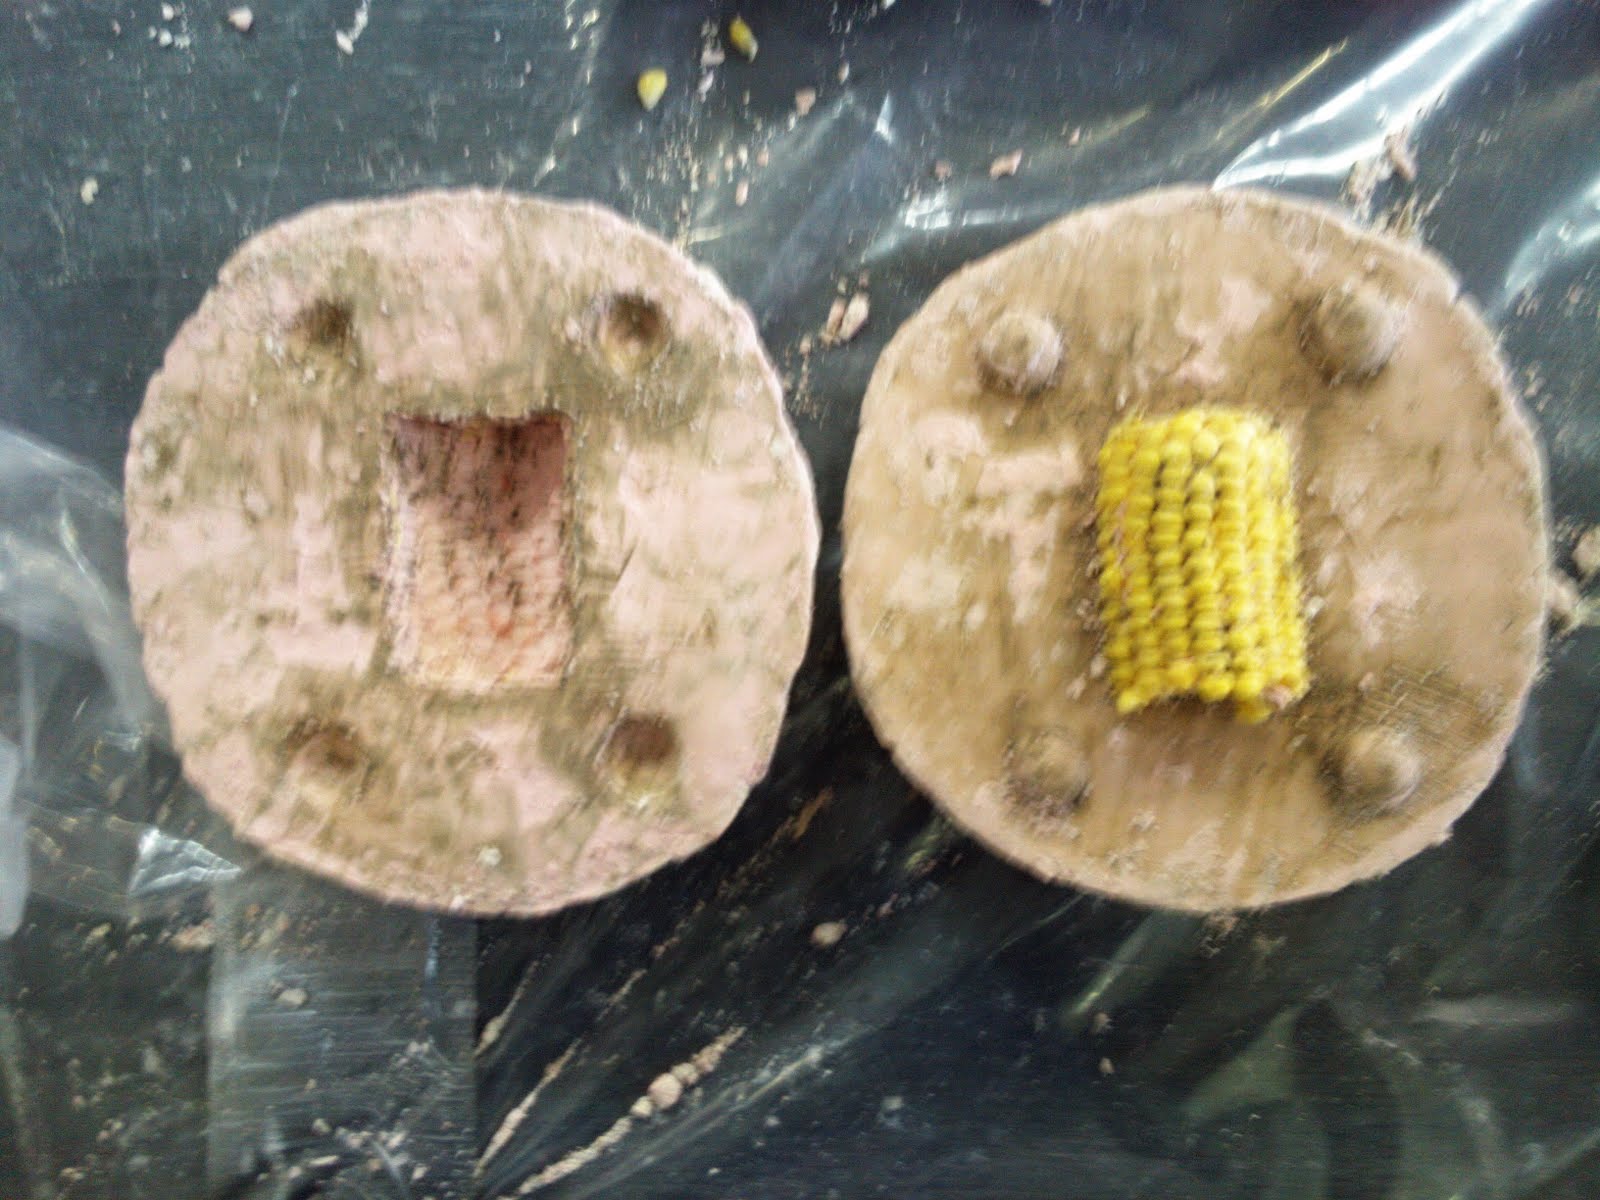
Casting from our moulds! To crack open our mould (image 1) we inserted the metal leaf tool into the seamline and twisted it. The mould should then split in half revealing the fruit. (image 2)

Casting from our moulds! To crack open our mould (image 1) we inserted the metal leaf tool into the seamline and twisted it. The mould should then split in half revealing the fruit. (image 2)
Pick the fruit out. We then painted "soft soap" mixed in water onto the mould, this will be the barrier between the mould and the plaster piece of fruit. Then put first layer of plaster into mould, added "plasterers scrim" (this is an open weave hessian) for reinforcement. (image 3) More plaster on top of this.
Finally, generously with hand, splash water over both sides of mould. Don't let it create a pool though, pour out. Then do the same with more plaster. Using the 4 keys as the guide quickly fix the two sides together. Plaster WILL go everywhere. Leave to set for about an hour.
With a malette and old chisel begin cracking away at the mould on one side at the white layer first. Underneath will be the dyed layer, continue to remove this too. Object will gradually be revealled. Repeat on other side. Careful not to chisel the object.
It was so satisfing to see the corn on the cob after the two days work. Eager to paint it.
Next stop Wood workshop today (in 3 hours!)
No comments:
Post a Comment