


Now onto workshop inductions...
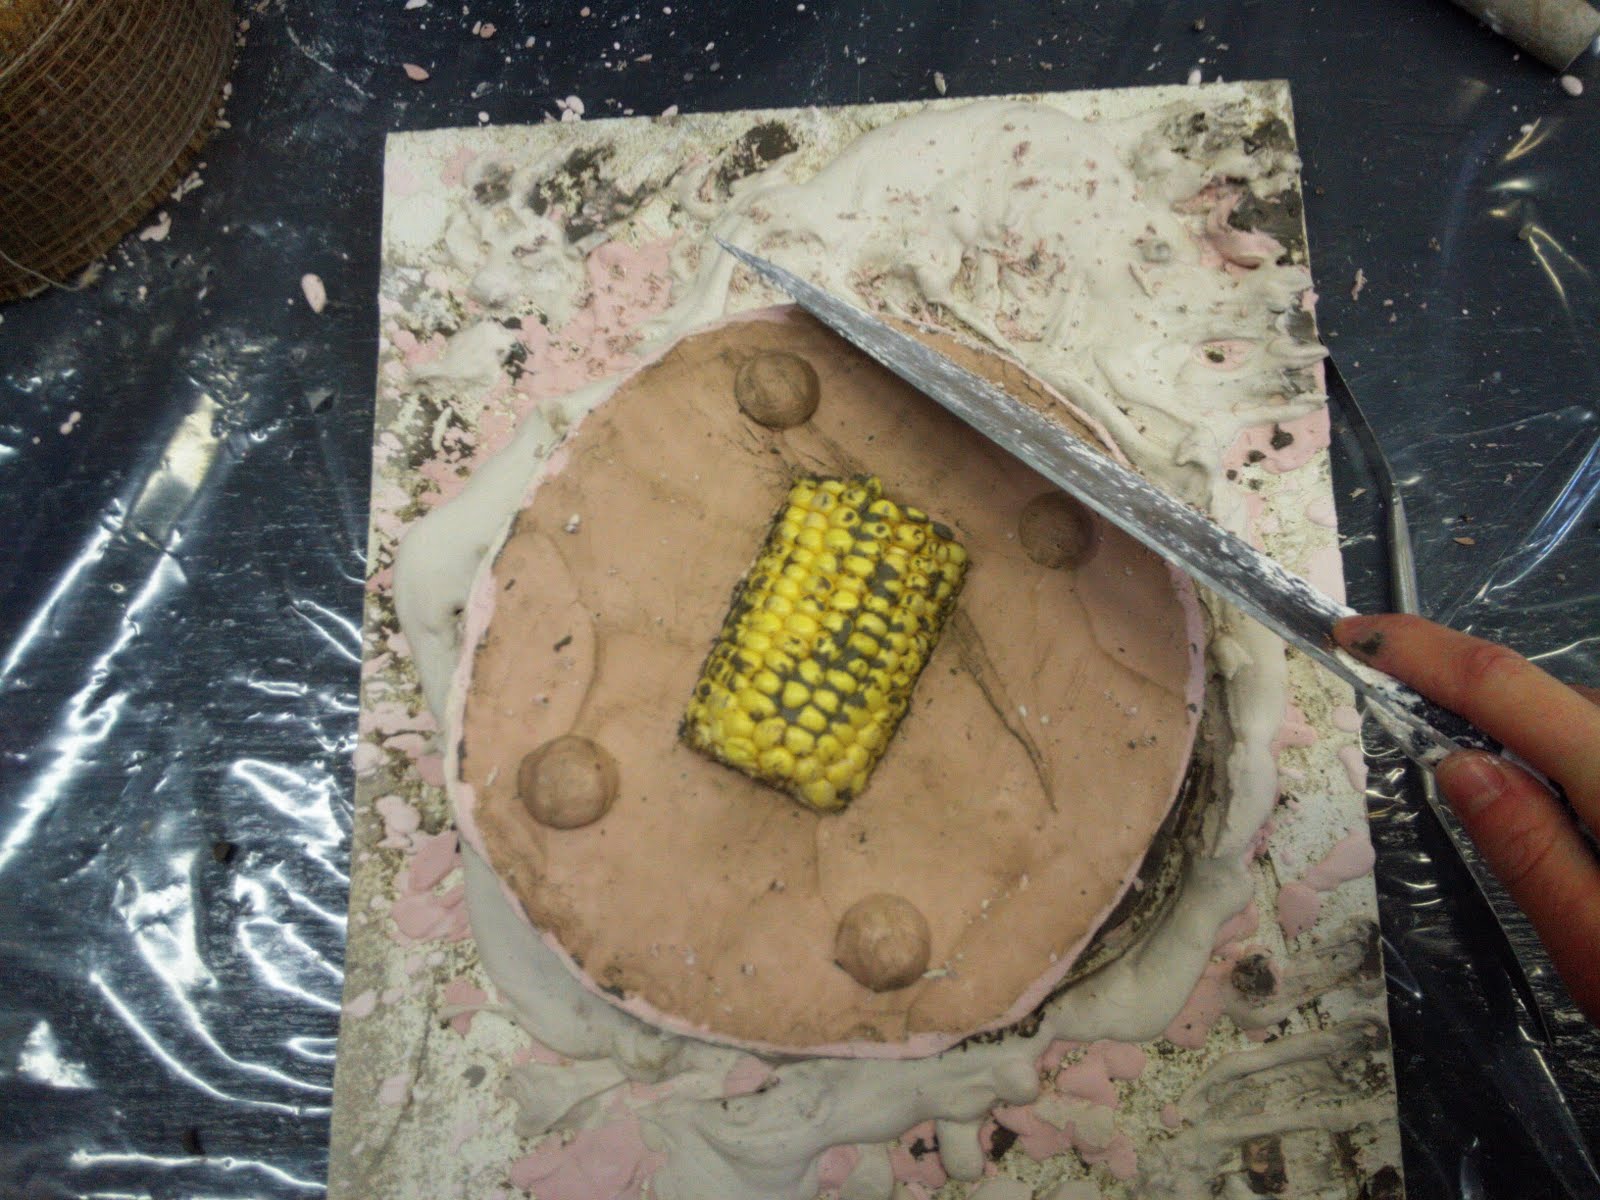
Today I made a mould for a piece of corn on the cob. Instructions as follows:
1. Find horizon line on the object. (halfway)
2. Place fruit on a board and create a bed of clay around it 2inches thick, 90 degree angle.
3. Impress 4 keys (circles).
4. For the plaster-mix some pigment with water, gradually add plaster in hand fulls until the plaster sits on surface. Bang bowl on table so the plaster is absorbed. Then mix with hands and apply to mould with a flicking movement. Plaster should be of a double cream thickness, try to create as much texture as possible on mould. Blow on plaster to push into details and eliminate air bubbles. Scrap around the edge of the mould to keep clean.
5. Add another layer of plaster (mixed with water only, no dye).
6. Leave to set for 1 hour.
7. Turn mould over and remove clay.
8. Cut the edges off the mould (pictured)
9. Apply a release agent-slip (clay and water) with brush around fruit.
10. Repeat step 4.
11. When set cut grooves across seamlines.
12. Wrap mould in polythene to keep damp for casting.
Casting on thursday. Thoroughly enjoyed today.
No comments:
Post a Comment